Sinus Lift for Dental Implants: How Much Bone You Need, Which Technique Fits, and What Recovery Is Really Like
A sinus lift rebuilds bone under the floor of the sinus so an implant has something to hold in the upper back jaw. Which version you need is decided by one measurement on a 3D scan — and sometimes the right answer is not a sinus lift at all.

Written and medically reviewed by Dr. Sam Jain, DMD, MS, and Dr. Arpana Gupta, DDS, MDS
Published · Updated
In this article
- 1Why the upper back jaw runs out of bone
- 2The measurement that decides everything: residual bone height
- 3The crestal sinus lift, step by step
- 4The lateral window sinus lift, step by step
- 5What goes under the membrane, and how long it takes to become bone
- 6The honest risks: membrane tears, sinusitis and the rest
- 7When a sinus lift is not the best answer
- 8Preparing for a sinus lift, and the first two weeks
Why the upper back jaw runs out of bone
Above the roots of your upper premolars and molars sits the maxillary sinus, an air-filled space lined by a thin membrane called the Schneiderian membrane. While the teeth are present, the bone around their roots holds the floor of the sinus in place. After those teeth are lost, two things happen at once. The ridge that held them shrinks — a systematic review of human re-entry studies measured 29–63% horizontal and 11–22% vertical bone loss within six to seven months of extraction — and the sinus slowly expands downward into the space the roots used to occupy.
The result is the sentence many of our patients have already heard somewhere else: there is not enough bone up there. The bone that remains in the upper back jaw is also naturally the softest in the mouth, so it has less density to offer an implant as well as less height. A sinus lift, also called sinus floor elevation or sinus augmentation, answers the height problem. The membrane is lifted gently away from the bone, and the space beneath it is filled with graft material that the body gradually turns into its own bone. Nothing about how the sinus drains, how you breathe or how you smell is being operated on; the work happens on the thin shelf of bone at its floor.
The measurement that decides everything: residual bone height
Before any technique is chosen, the height of bone between the top of the ridge and the floor of the sinus has to be measured in three dimensions. The American Academy of Oral and Maxillofacial Radiology recommends cross-sectional imaging for every implant site and names cone beam CT as the imaging method of choice. A flat panoramic X-ray cannot show the slope of the sinus floor, bony walls inside the sinus called septa, the thickness of the membrane, or whether the sinus itself is inflamed — and each of those changes the plan.
That number — residual bone height — matters because it predicts whether an implant can be held firmly on the day of surgery. In a multicenter report on the bone-added osteotome technique, the version of the crestal lift described by Rosen, Summers and colleagues, implant survival was 96% or higher when there was 5 mm or more of bone before treatment and fell to 85.7% when there was 4 mm or less. The authors named pre-existing bone height as the single most important factor. It is the reason we treat the scan, not the X-ray, as the start of the conversation.
As a practical guide, and never as a substitute for reading your own scan: when there is enough height for an implant of adequate length, no lift is needed. When there is roughly 5 to 6 mm or more of firm bone, a crestal lift with the implant placed in the same visit is often possible. When there is less, the choice widens to a crestal lift with a staged implant, a lateral window lift, a shorter implant, or — in a severely resorbed upper jaw — implants that avoid the sinus altogether. Primary stability, the firmness of the implant at insertion, is confirmed in surgery; if a site we planned to load turns out too soft, we graft and wait rather than force it.
The crestal sinus lift, step by step
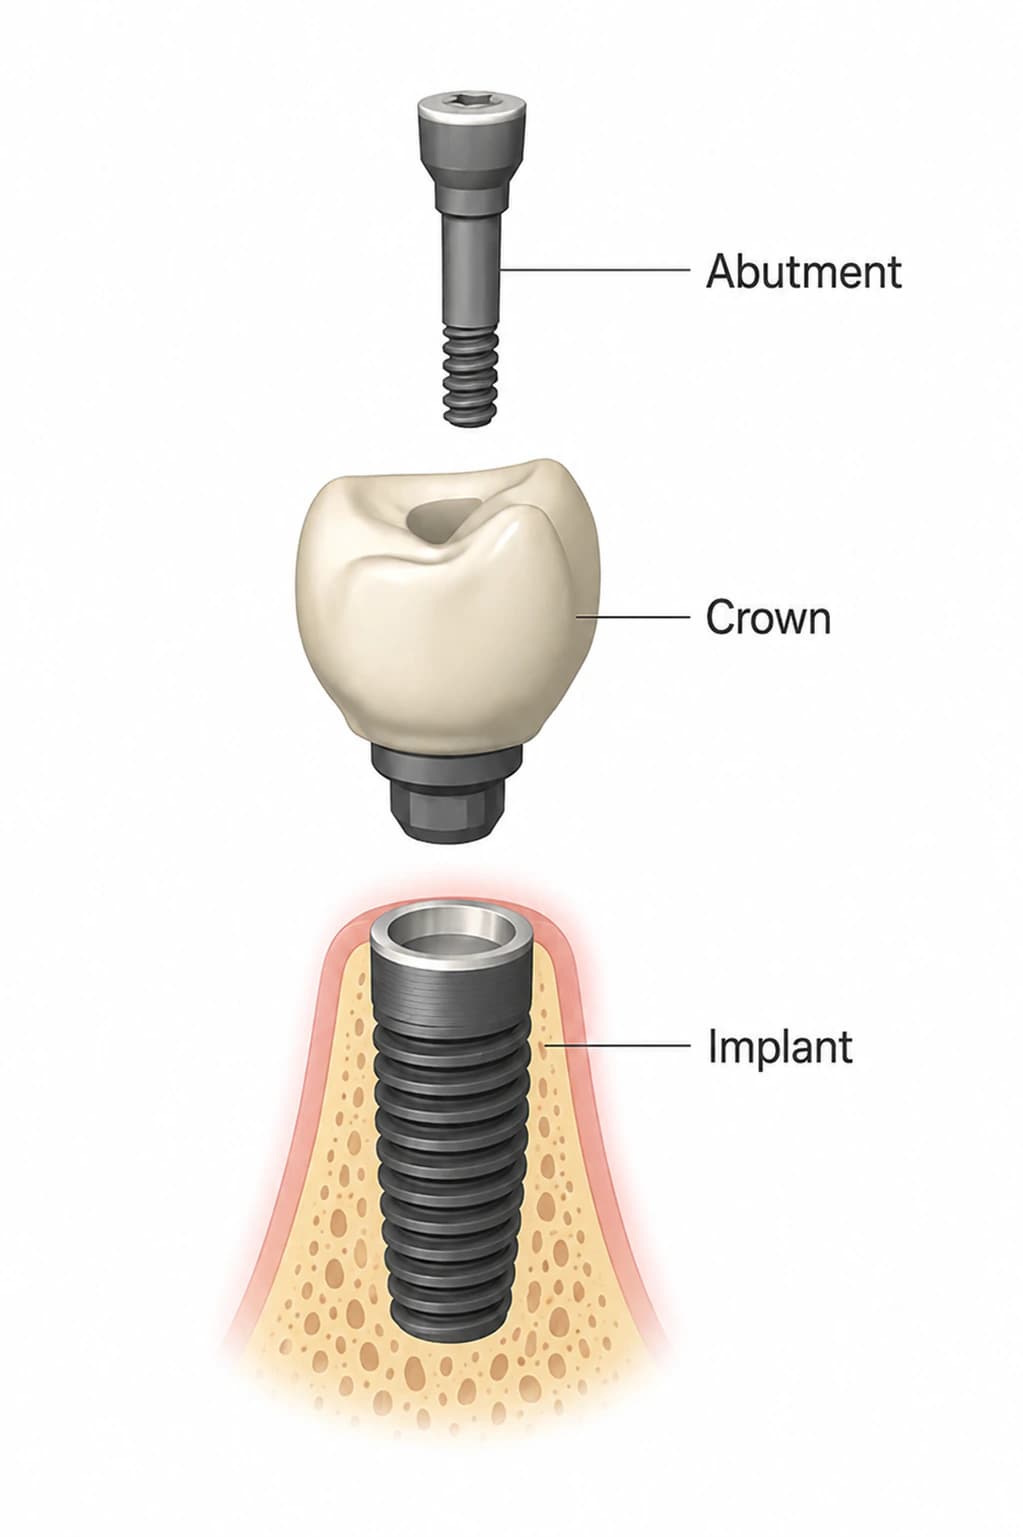
The crestal (transcrestal) approach works through the same small opening prepared for the implant, from the top of the ridge. After local anesthesia, the site is prepared to just short of the sinus floor. That last millimeter or two of bone is then pushed upward, lifting the membrane with it, and graft material is fed through the opening to hold the membrane up. Where the bone allows, the implant goes in at the same appointment, and it becomes the tent pole that keeps the lifted membrane in place while the graft matures around it.
Classically the floor was tapped upward with osteotomes. We more often use osseodensification burs, which compact bone into the walls of the site instead of cutting it away, and which drive graft and fluid upward in a more controlled way. In a 2024 multicenter study of 621 patients treated with this technique in sites with between 2 and 7 mm of bone, the membrane perforated in 7.31% of lifts, with bone height of 3 mm or less the main risk factor. Across the transcrestal literature as a whole, a systematic review of 19 studies put implant survival at 92.8% three years after loading, with a low rate of complications.
The crestal route is smaller surgery: no separate incision on the side of the jaw, usually less swelling, and a shorter appointment. Its limit is visibility — the membrane is lifted by feel rather than sight — which is why it belongs to moderate lifts in adequate bone. Our doctors can track the drills against your CBCT scan with dynamic navigation (X-Guide and Navident EVO), so the depth of each step is measured against the plan rather than estimated. When the combined extraction, lift and implant are possible in one visit, we explain how that decision is made in our clinical case on crestal lifts with immediate placement.
The lateral window sinus lift, step by step
When the bone under the sinus is very thin, or a large lift is needed, the lateral window approach gives direct access. The gum on the cheek side of the upper back jaw is folded back, and a small oval window is created in the side wall of the bone — often with piezoelectric instruments, which cut bone but are far less aggressive toward soft tissue. The membrane is then peeled up from the floor of the sinus under direct vision, the space beneath it is filled with graft, and the window is covered with a membrane before the gum is closed.
If there is enough bone for the implant to be held firmly, it can be placed at the same surgery. If not, the graft heals first and the implant follows months later. A landmark systematic review of lateral window lifts, covering 48 studies and 12,020 implants, estimated three-year implant survival at 90.1% overall — and 98.3% for rough-surface implants placed with a membrane covering the window — the combination modern practice favors. The same review showed why patient-level numbers matter: 16.6% of patients lost at least one implant over three years across the whole data set, a figure that includes older implant surfaces and techniques.
What goes under the membrane, and how long it takes to become bone
Graft materials fall into four families: your own bone (autograft), processed human bone (allograft), processed animal bone, usually bovine (xenograft), and synthetic materials such as beta-tricalcium phosphate. A systematic review of 136 human studies that took biopsies from grafted sinuses found that your own bone produced the most new bone, but that substitute materials are good alternatives which avoid a second surgical site, and that adding autogenous bone to substitutes brought no significant advantage. Slow-resorbing materials are valued in the sinus precisely because they hold their volume while new bone grows in.
Material choice also explains a question we are asked by other clinicians: whether a fast-dissolving material such as calcium sulfate can hold a crestal lift on its own. Usually it cannot, because it resorbs before the lifted space has organized into bone — a problem Dr. Jain explains in detail in this case discussion. Where it helps, we add platelet-rich fibrin made from a small sample of your own blood, which is used to support early healing of the soft tissue and the graft.
Healing time follows the material and the size of the lift. The same biopsy review found significantly more new bone after more than four and a half months of healing than before it, with no significant difference between roughly six and ten months for most materials. In practical terms, a staged graft usually heals about four to nine months before the implant is placed, and your surgeon confirms readiness on a follow-up scan rather than a calendar. A deeper look at the materials is in our research review of bone graft materials.
The honest risks: membrane tears, sinusitis and the rest
The most common complication is a tear in the sinus membrane. A meta-analysis of 1,652 sinus lifts found perforations in 23.5% of them, with a range from 3.6% to 41.8% between studies; a thin membrane and bony septa inside the sinus raised the risk, and piezoelectric instruments appeared to lower it. The same analysis found that implant survival on the perforated side was not significantly different from survival on the intact side. A small tear is repaired during surgery, usually with a collagen membrane, and the graft proceeds; a large one may mean closing, healing, and returning to graft later. This is why we look for septa and membrane thickness on the scan before we start.
Sinus infection after the procedure is uncommon. A 2024 meta-analysis put the pooled rate of sinusitis after sinus lifts at 1.11% — 1.35% for lateral window lifts, and no reported cases in the transcrestal studies it included. For comparison, the rate after zygomatic implants was 3.76%. A sinus that is already inflamed or infected should be treated before a lift, not during one, and occasionally that means a visit to an ear, nose and throat physician first.
Other possible events are the ordinary ones of oral surgery — swelling and bruising along the cheek, a nosebleed in the first day or two, and discomfort that is usually managed with prescribed medication and ice — along with less common ones such as graft infection, loss of some graft volume, or an opening between the mouth and the sinus that needs closure. All of these are written into the consent you sign, because a patient should hear them before surgery rather than meet them afterward.
When a sinus lift is not the best answer
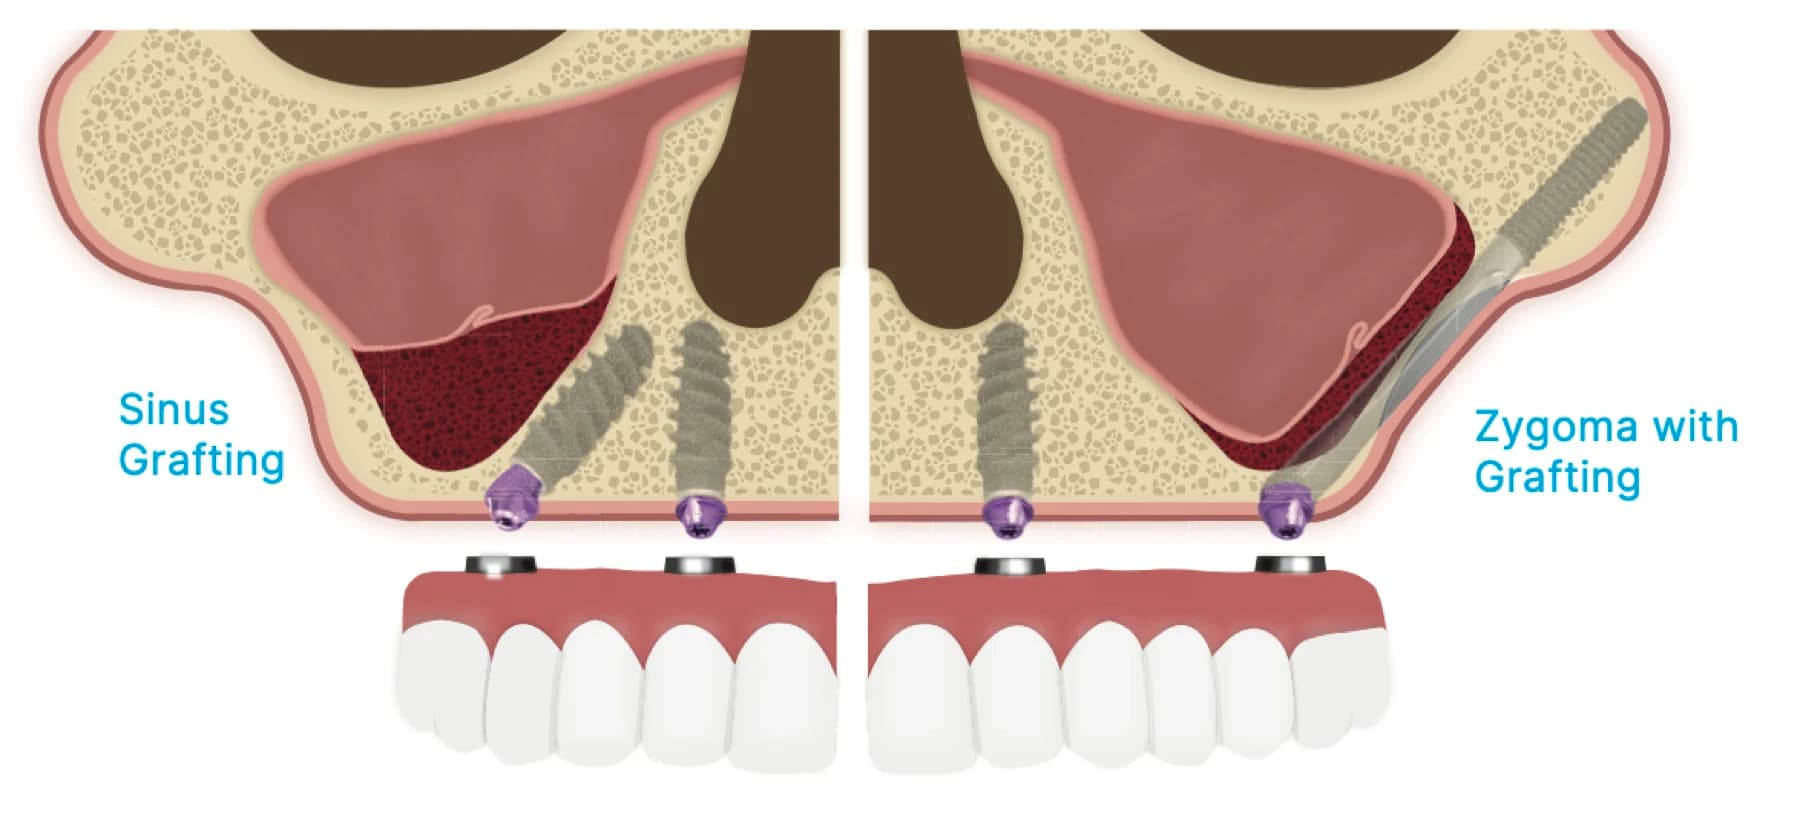
A shorter implant can sometimes replace the lift entirely. When the European Association for Osseointegration pooled eight randomized trials comparing short implants with longer implants placed into lifted sinuses, survival at 16 to 18 months was 99.0% for the short implants and 99.5% for the longer ones; complications, mostly membrane perforations, were almost three times as frequent in the lifted group, and patient-reported outcomes, surgical time and cost favored the short implants. A 2019 meta-analysis of randomized trials reached a similar conclusion for extra-short implants of 6 mm or less up to three years. The honest limitation is time: long-term data for the shortest implants is still thinner than for conventional lengths, which we discuss in our research review on short implants versus grafting.
For a whole upper arch, tilting the back implants forward along the front wall of the sinus — the principle behind All-on-4 — can avoid grafting. And when the upper jaw is so resorbed that grafting would be long, repeated or unpredictable, zygomatic implants anchor in the cheekbone instead; a systematic review of 196 publications reported a cumulative success rate of 96.1% after more than five years. We place them in the same practice, which means the recommendation you receive is not limited to the procedures one surgeon happens to offer.
Preparing for a sinus lift, and the first two weeks
Bring a complete list of medications and supplements, especially blood thinners and anything for the heart, diabetes, bone density or the immune system, and tell us about sinus infections, allergies, nasal surgery or chronic congestion. If you smoke, stopping before and after surgery genuinely improves how grafts heal. Most lifts are done under local anesthesia; if you would rather not be present, IV sedation is given by our doctors, and you will need an escort home.
For about two weeks, the rule that matters most is pressure. Do not blow your nose forcefully, sneeze with your mouth open, avoid drinking through straws, and skip heavy lifting, swimming underwater and flying unless we have cleared it. Expect swelling that peaks around the second or third day, sleep with your head a little raised, and follow the medication schedule exactly as written. Any bleeding from the nose should settle within a day or two; persistent bleeding, fever, a foul taste, or air or fluid passing between the mouth and nose is a reason to call us the same day.
The follow-up visits, the scan that confirms the graft is ready, and the implant and final tooth are handled by the same two doctors, and the tooth itself is designed and milled in our own lab. If you have been told there is no bone for an upper implant, the useful next step is a consultation with a 3D scan that shows you the measurement for yourself.
Written and medically reviewed by Dr. Sam Jain, DMD, MS, and Dr. Arpana Gupta, DDS, MDS, who own this practice. Reviewed
This article is patient education, reviewed by Dr. Sam Jain, DMD, MS, and Dr. Arpana Gupta, DDS, MDS, and is not a substitute for an exam. Treatment recommendations are made only after an in-person consultation and 3D imaging.