How to Clean and Maintain All-on-4 Dental Implants
Your new teeth don't decay, but the gum and bone around them still need care — here's the daily routine and professional schedule that keeps an All-on-4 bridge healthy for decades.


Written and medically reviewed by Dr. Sam Jain, DMD, MS, and Dr. Arpana Gupta, DDS, MDS
Published · Updated

The short version: what a daily routine looks like
Clean your All-on-4 bridge twice a day, and make sure one of those cleanings gets under the prosthesis, not just across the top. A soft-bristled manual or electric toothbrush with a non-abrasive toothpaste handles the visible surfaces. Then a water flosser does the real work: you aim the tip along the seam where the bridge meets your gums and let the water stream flush out food and plaque from underneath. That's the whole foundation. Everything else is refinement.
Here's the mental shift that helps. Your old teeth could get cavities, so brushing was about protecting the tooth. Your new teeth can't decay at all. So daily cleaning is now entirely about the gum tissue and bone around your four (or more) implants. Keep that tissue clean and pink and it stays healthy for decades. Let plaque build up along the gumline and it can inflame the tissue and, over time, threaten the bone that holds the implants — a problem called peri-implantitis. Almost all of that risk is in your hands, which is genuinely good news.
If you want the fuller picture of how the restoration is designed and placed, our All-on-4 in Fremont page walks through the procedure itself. This article is about what happens after — the years of daily care that protect the investment.
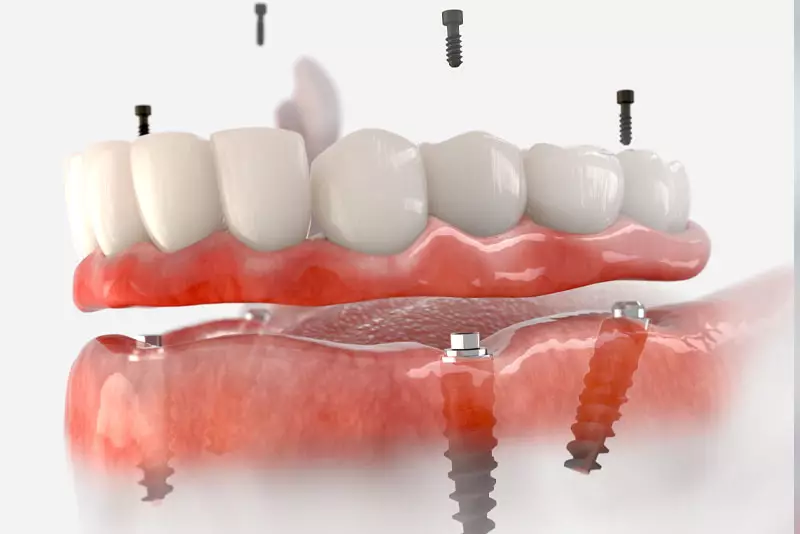
The tools that actually work under the bridge
An All-on-4 prosthesis sits slightly above your gums with a small gap underneath, so food and bacteria can collect there. Reaching that space is the entire game, and a regular toothbrush won't do it alone. A water flosser (a Waterpik or similar) is the workhorse — hold it at roughly a 45-degree angle to the gumline, start on a low-to-medium setting, and trace slowly along both the cheek side and tongue side of the bridge. Pay extra attention to the back, where the rearmost implants are usually angled and debris likes to gather.
Add interdental brushes or a floss threader with special implant floss (many patients like Super Floss or a thick, spongy floss) to physically wipe the underside of the bridge and the sides of each implant post. Use a soft nylon interdental brush rather than one with an exposed metal wire, which can scratch. For the top surfaces, a soft toothbrush and a low-abrasion toothpaste are plenty — skip whitening pastes and baking-soda scrubs, since the abrasives can dull the polish on the prosthetic teeth over time. Your surgeon will show you the exact sequence at delivery and tailor it to how your specific bridge is shaped.
One honest note: the first couple of weeks feel fiddly, and that's normal. Give it a month and it becomes muscle memory that takes three or four minutes. If you're weighing this routine against the daily hassle of a removable denture, our comparison of dental implants versus dentures lays out the trade-offs plainly.
Professional cleanings: the part you can't do at home
No matter how diligent you are, some plaque hardens into calculus in places you simply can't reach — and that requires a professional. Plan on a maintenance visit every three to six months. Your hygienist uses instruments designed for implants (typically plastic, titanium, or ceramic tips rather than the steel scalers used on natural teeth, which can scratch the implant surface) and checks the health of the gum tissue around each post.
Periodically — often once a year, sometimes more — your dentist may unscrew the entire bridge, clean it and the implant abutments thoroughly on the benchtop, inspect for any loosening or wear, and screw it back into place. This is routine, not a repair, and it's one of the real advantages of a fixed-but-retrievable All-on-4 over other designs. Because we plan, place, and restore every case in-house — the same two surgeons, Dr. Sam Jain and Dr. Arpana Gupta, from consultation through every recall — the person maintaining your bridge is the person who built it and knows exactly how it comes apart. You can read more about that all-under-one-roof approach on our why choose us page.
Bring anything odd to these visits: a bad taste, tenderness, a spot that traps food, or a screw that feels different. Catching a small issue early is the whole point of the schedule. If something feels genuinely wrong between visits, our overview of dental implant complications explains which symptoms warrant a same-week call.

Habits that protect the bone underneath
Good implants fail for boring, preventable reasons more often than dramatic ones. Smoking is the big one — it meaningfully raises the risk of gum inflammation and bone loss around implants, and quitting is the single most protective thing a smoker can do for their new teeth. Uncontrolled diabetes and heavy grinding also matter. If you clench or grind at night, a nightguard protects both the prosthetic teeth and the implants underneath from the constant load; ask your dentist whether you're a candidate.
Watch what you chew, at least with judgment. All-on-4 teeth are strong and let most people eat almost normally, which is the point. But cracking ice, chewing pens, or biting fishing line and bottle caps can chip zirconia or, worse, loosen a screw. Treat them like very good natural teeth, not indestructible tools. And keep the rest of your health in the loop — your general physician and dentist should both know you have implants, since overall inflammation and healing capacity affect the tissue around them.
The payoff for all of this is real. Well-placed, well-maintained implants show roughly a 95% long-term survival rate in the research, and the difference between the successes and the failures is very often day-to-day hygiene and keeping up with recall visits. If you're still in the planning stage and want to understand the full commitment — cost, financing, and timeline included — our All-on-4 cost breakdown and our team are a good next step. A free consultation with a 3D scan is where most patients get their specific questions answered.
Written and medically reviewed by Dr. Sam Jain, DMD, MS, and Dr. Arpana Gupta, DDS, MDS, who own this practice.
This article is patient education, reviewed by Dr. Sam Jain, DMD, MS, and Dr. Arpana Gupta, DDS, MDS, and is not a substitute for an exam. Treatment recommendations are made only after an in-person consultation and 3D imaging.